
Azure Pipeline
Use Azure DevOps Extension Tasks to Add a Visual Studio Extension Publishing Task to Your pipeline.
Microsoft recently released the Azure DevOps Extension Tasks tool for Azure DevOps that makes it easy to add a Visual Studio Extension publishing task to a pipeline, but I wasn’t able to find any layman’s documentation on setting it up.
At the time of writing, the Azure Extension Marketplace listing only says that Visual Studio Marketplace publishing is ‘soon to come,’ so I’ve documented the steps I went through, and the links I used, to simplify the process for other beginners.
With that being said, Step 1 presumes you already have an Azure project with a default Build pipeline for your VSIX extension.
Step 1: Create a “Publisher” (or Use an Existing One) on Visual Studio Marketplace
This Microsoft Docs page is very helpful in explaining the setup process required for a Marketplace Publisher.
Take note of the Publisher ID that you want to publish the extension under, you’ll need it in the next step and later.
Step 2: Add a publishManifest to Your VSIX Extension Project
To publish from the command line (how the DevOps pipeline task works), place the required information in a publishManifest. Previously this information would normally be put into the Visual Studio Marketplace publish form. Add a publishManifest to the root of your VSIX project and push it to your repo. Again, this file contains all the metadata about your extension needed for Visual Studio Marketplace and will be used in the publish task.
To see how to create one, read this publishManifest file example from Microsoft Docs.
Step 3: Create a Personal Access Token in Azure DevOps
To publish from the command line, a Personal Access token is also required to verify that you are authorized to publish under the Publisher ID in the publishManifest. This personal access token (PAT) must use the same Microsoft organization that is used in the Publisher, so that it can be used with the Marketplace Service Connection in Step 4.
See Acquire a PAT from Microsoft Docs for more info. Then, set the expiration date to whatever you think is best, and "Be sure to select the Marketplace (publish) scope" (as shown in the ‘Aquire a PAT’ example screenshots).
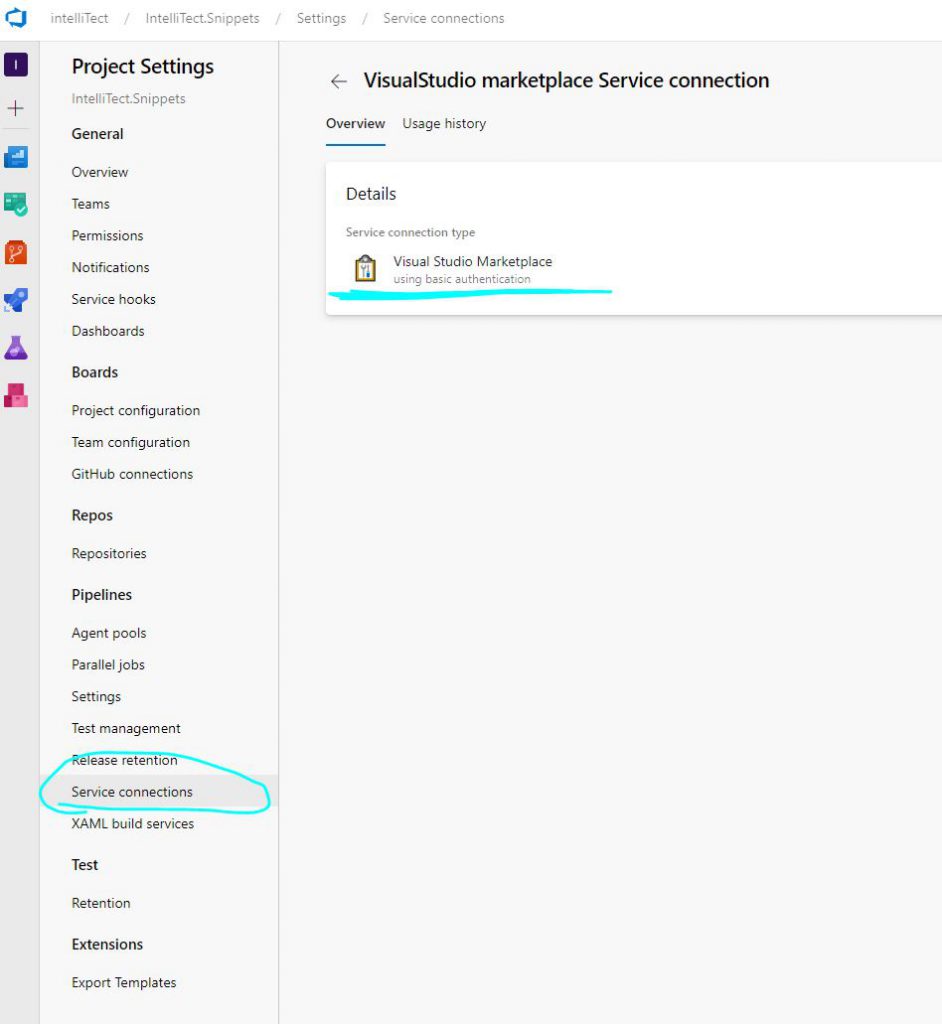
Step 4: Set Up a Service Connection
The command line Publish task will run through a Visual Studio Marketplace Service Connection as well as utilize the PAT to do the verification as mentioned in Step 3. For help setting up a Visual Studio Marketplace Service Connection, see this Create a Service Connection Microsoft Doc.
Step 5: Install Azure DevOps Extension Tasks
Install the new Tool: Azure DevOps Extension Tasks from the Visual Studio Marketplace. Click the “Get it free” button then you will be asked to authorize it for your DevOps organization.
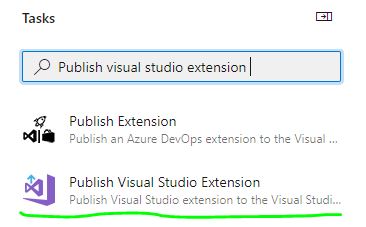
Step 6: Add and Configure the Publish Task
Now we can finally add the task, called PublishVisualStudioExtension@3 to the pipeline’s YAML after the build task utilizing the Azure DevOps Extension Tasks.
Once you have the above extension installed, edit the YAML of your pipeline. Then, add the Publish Visual Studio Extension via the available task templates in the DevOps YAML editor.
Select the Marketplace connection added in Step 4.

The VSIX File and Manifest File fields need to be paths. The default DevOps variable $(Build.SourcesDirectory) refers to the root of your checked-out repo on the machine. It can be used to build a path to the default bin/release folder of the build task. Likewise, you can use the variable as part of the paths to your manifest as well as the VSIX extension that was made in the build task. See the below example code.
'$(Build.SourcesDirectory)\IntelliTect.Snippets\bin\Release\IntelliTect.Snippets.vsix'Use the Publisher ID from Step 1 for the ‘Publisher ID’.
Consider adding common warnings (like the example below), then put them into the ‘Warnings to Ignore’ field.
VSIXValidatorWarning01,VSIXValidatorWarning02The screenshot below shows the final configuration of the Publish Visual Studio Extension task.
Note the use of the default DevOps variable $(Build.SourcesDirectory) to get at the bin\release folder where the VSIX extension is placed by default (along with the publishManifest file from Step 2).
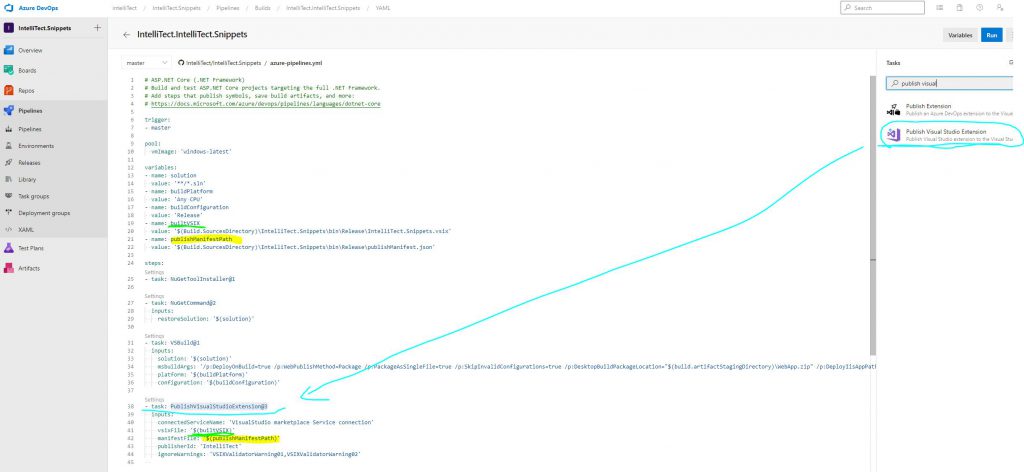
The final YAML task:
variables:
- name: builtVSIX
  value: '$(Build.SourcesDirectory)\IntelliTect.Snippets\bin\Release\IntelliTect.Snippets.vsix'
- name: publishManifestPath
  value: '$(Build.SourcesDirectory)\IntelliTect.Snippets\bin\Release\publishManifest.json'
- task: PublishVisualStudioExtension@3
inputs:
connectedServiceName: 'VisualStudio marketplace Service connection'
vsixFile: '$(builtVSIX)'
manifestFile: '$(publishManifestPath)'
publisherId: 'IntelliTect'
ignoreWarnings: 'VSIXValidatorWarning01,VSIXValidatorWarning02'Conclusion
When this pipeline runs your new extension will be published.
This is really great for extensions that are modified a lot, such as an extension for code-snippet sharing.
To sum up, if users of the extension have automatic updates enabled, then they will receive new versions right away!
Note: The extension example in this post is intended for basic code-snippet sharing. The all-in-one build and publish pipeline works. However, consider placing the Publish task in the “Release” pipeline to ensure that your extension is only published when you intend.
Want More?
Check out Kevin Bost’s blog, How to Publish NuGets with Azure DevOps. Learn about the features DevOps Release pipelines have to offer.

Comments are closed.