
The New Normal and How to Adjust
With so many in-person events being canceled or moved online, there is a growing need for all of us to master the art of online presentations.
For many of us, giving an online presentation can be nerve-wracking. At least once a week I present as part of my live stream. Though I do my best, this often results in easily avoided mistakes. To counteract this, I spent the last several months compiling a checklist of all of the things I like to do before delivering a presentation. This list is focused on the things I try to do before delivering an online presentation or doing a live streaming session on Twitch. The full list can be found as a gist on GitHub and contains additional items when presenting in person.
Step 1 – Turn Off All Notifications
This one is straight forward. You don’t want your presentation interrupted. Built directly into the Windows 10 notification system is the ability to suppress those notifications using the Focus Assist feature. It only takes a few clicks to turn on and can save you from most interruptions.
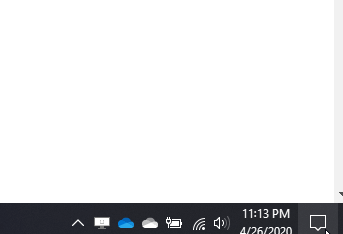
Though Focus Assist handles most things, some software programs use their own notification system. When in doubt, if the program is not needed as part of the presentation, turn it off. Typically, the biggest offenders are communication and messaging applications; Slack, Microsoft Teams, Discord, etc. I would also suggest making sure irrelevant web sites are closed as well.
Step 2 – Clean Up Your Desktop
It is always best to keep your screen clean and focused on what you are presenting. If you must switch between multiple applications, there is a good chance you show your desktop at some point. To keep it clean, you can hide your desktop icons to keep your desktop looking neat and tidy.
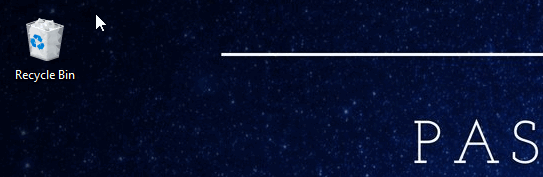
While you are there, this is probably a good time to consider if your desktop background is appropriate for the presentation or if you should select a different one.
Finally, consider hiding the taskbar to help keep your screen free of distractions. To do this, right-click on the taskbar, select Taskbar settings, and then turn on the toggle to automatically hide the taskbar in desktop mode.
You can also use a separate desktop to help segregate your virtual presentation space from your regular activity.
Step 3 – Consider Accessibility
When presenting online, remember that many people may not have large, high-resolution monitors. This can make viewing presentations at these higher resolutions small and challenging to see. Consider turning down your resolution. I find that 1680×1050 or 1440×900 are good compromises between having enough space to present and being easily visible for presentations. You may also want to adjust the DPI as well to help with readability.
When possible, consider increasing the font size or zoom on the applications you will be using during the presentation. I tend to use at minimum 14 point font or larger.
There is an excellent tool called ZoomIt that can be used while presenting. As the name implies, it gives a quick and easy way to zoom in on a portion of your screen. It also supports drawing directly on the screen (arrows, boxes, freehand). This tool can be quite helpful to guide your viewers’ attention to smaller details.
Step 4 – Prepare for the Presentation
Before starting the presentation, launch all relevant applications and demos and make sure you have all needed utilities up and running. In addition to ZoomIt, I also like to use Carnac. It displays shortcut keys onscreen to make it easier for others to follow along.
Turn down or mute your speakers to avoid feedback (headsets are another great alternative). Test your microphone to make sure it is on and working. If you plan to use a web camera, make sure it is on and functioning.
Remember, Presenting Online is Stressful
The most important thing is to relax. When possible, give yourself time for a short break between going through this checklist and starting the presentation. Hopefully, this short checklist helps build a little more confidence that you have everything ready to go.
Did I miss any steps?
Is there anything extra you do before an online presentation? Let me know in the comments below.
Want More?
Check out my blog on presenting in OBS using a virtual green screen.