Exploring Suspended Work
In order to keep our release builds as bug-proof as possible, our development team expects that code reviews are to be completed before checking in the code changes. This presents a problem with Pending Changes in Visual Studio. Let’s say I modify a few files for a particular user story or bug. After I submit the code review, and depending on the availability or responsiveness of the other team members, there will likely be a delay before I can check the code into Team Foundation Server (TFS). If I need to work on another issue, I would now have a mixed set of modified files in my Pending Changes, possibly with changes in some of the same files. Fortunately, since Visual Studio 2012, Microsoft has a solution. It’s called Suspended Work.
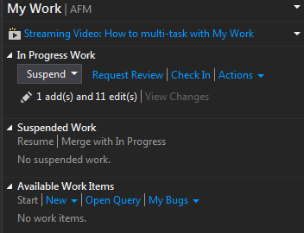
Under the Team Explorer tab in Visual Studio there is a collection of options including My Work, Pending Changes, Source Control Explorer, etc. Selecting My Work shows In Progress Work, Suspended Work, Available Work Items, and Code Reviews.
Although an active Work Item (TFS User Story or Bug) is not required in order to use the Suspended Work feature, Visual Studio does relate Work Items if you do. If you want to relate one or more work items, those under Available Work Items can be dragged up to In Progress Work and vice versa. A history comment will appear on each listed work item whenever the associated code is shelved, un-shelved, and finally checked in.
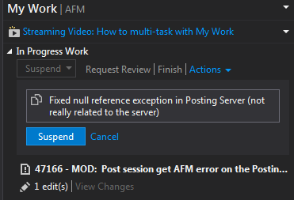
All active Work Items and currently Pending Changes are considered In Progress Work. If the Suspend button is clicked (see image above) then the user will be offered a text area in which the default description (taken from the Work Item, or n edit(s) if there is no Work Item selected) can be left, or a specific description can be entered. Clicking the second Suspend button under the text area (see image to the right) shelves the code along with references to the active Work Items, currently open files, breakpoints, etc. Basically, the current state of Visual Studio is saved for later recovery. Modified files will be reverted to the Latest Version.
Now the user is ready to start on a new Work Item without worrying about changing the files that have been shelved for code review.
When the code review is complete, there are three possibilities for recovering the suspended work. If there are other modified files, as shown in the image on the left [note 2 edit(s "Suspend and Resume in Visual Studio using TFS")], the options will be to ‘Switch’ the current work with the suspended work or to ‘Merge’ the suspended work with the current In Progress Work.
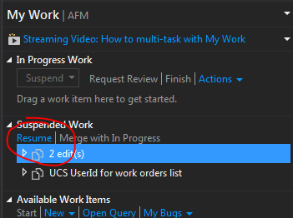
If there are no current edits, as shown in the image on the right, the only option will be to ‘Resume’ the suspended work.
To check in the reviewed code, the user would select ‘Switch’ or ‘Resume’ and the suspended work would be recovered along with the previous state of Visual Studio. The code can then be checked in. The shelve set will be deleted automatically. If ‘Switch’ is chosen, then the current work is suspended before the selected work set is restored. After check-in is complete, then the previous work [for instance, 2 edit(s)] can be ‘Resumed’.
This process also works for other scenarios. Say you’re working on a change and get interrupted with a more important task: you can suspend your current work and take on the new task. When finished, you can resume your previous work exactly where you left off; bookmarks, breakpoints and all.
This is a powerful feature that has many uses. I hope you find it as useful as I do.