
Streaming in OBS Without a Physical Greenscreen
If you are anything like me, when you read Microsoft MVP Kevin Bost’s article on creating a virtual greenscreen with OBS on Teams, you got pumped to try it out. Then you eventually ran into a situation where you just wanted to record yourself or stream in general, and you didn’t have a physical greenscreen, and you thought, “there must be an easier way.”
With some searching and testing, I found this great little piece of software called NVIDIA Broadcast that filled the hole I needed. The only catch is that you have to have an NVIDIA RTX-enabled GPU to handle the system requirements of NVIDIA Broadcast.
Now, enough talking about the fine print. Let’s dive in.
Setting up NVIDIA Broadcast
If you haven’t looked at OBS before, a great place to start could be this project OBS tutorial or this blog post written by Microsoft MVP Kevin Bost.
First, after installing the NVIDIA Broadcast App, navigate to the camera tab.
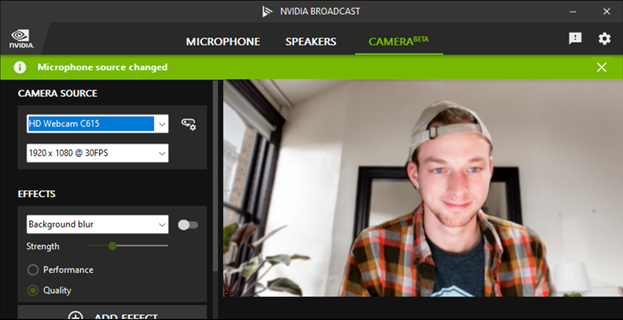
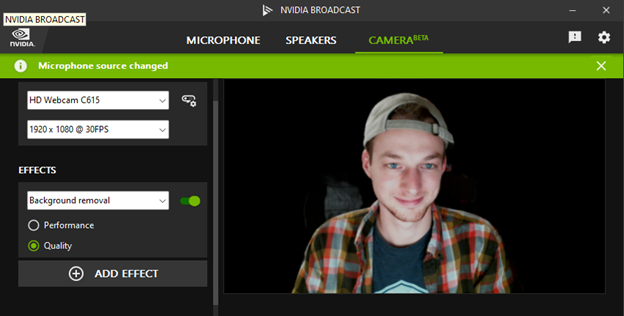
On the left-hand side, under effects, choose the dropdown and select “Background removal.” I have found that selecting quality over performance produces noticeably better results, at least in my environment; this removes the background behind me, and I have found it to work impressively well.
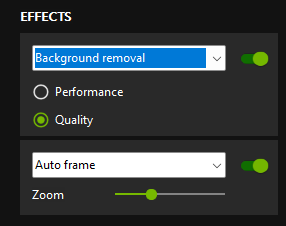
A remarkable feature that Broadcast provides is that you can also stack effects! The only downside is that you can only stack two at a time, and I wish I could stack more. I enjoy turning on Auto frame and zooming in a bit, which allows the image to be better framed on myself. Additionally, it has auto-tracking to keep you centered in the frame even if you move around! Video noise removal could also be turned on if you are filming in a low-light environment.
Instead of background removal, it is also possible to do background blur and background replacement like features of Teams or Zoom that have virtual backgrounds. Since Broadcast is a camera source, you can have a blurred or virtual background in any application that takes in a camera input.
Integrating with OBS
Now moving to OBS, the initial setup is very similar to the beginning part of Kevin’s blog explaining streaming online presentations using OBS.
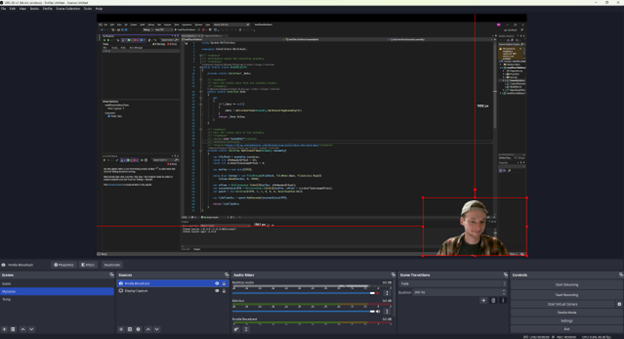
Using the plus (+) button on “Scenes,” create a single scene named “MyStream” with two input sources. Then using the plus (+) button on “Sources,” add two inputs to make your stream. The first input uses “Display Capture” to capture the screen you wish to share.
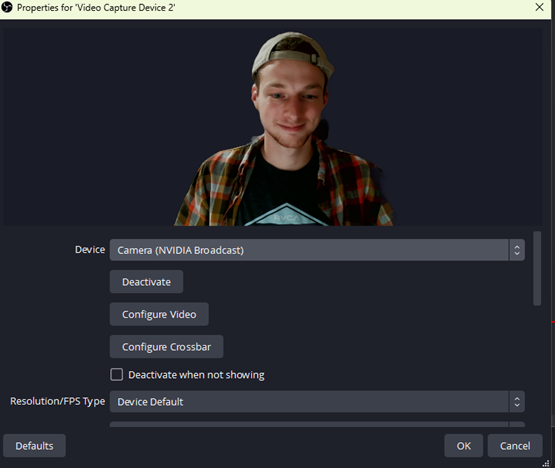
The second source uses the “Video Capture Device” input to bring in your web camera, which I name “NVIDIA Broadcast” for clarity. Under the properties for this Video Capture Device, I select the device to be “Camera (NVIDIA Broadcast).”
You must have the Video Capture Device (camera source) above the display capture source. This location ensures that the camera’s input is above the desktop display. Also, you need to confirm that the little eyeball icon shows the source as enabled.
Now you can move the sources around, change sizes, and crop (hold down Alt while resizing) to get the layout exactly as you wish. Once you are happy with it, I recommend clicking the Lock button to the right of each source to prevent accidental changes.
The result should look like the image below.
Time to Try NVIDIA Broadcast
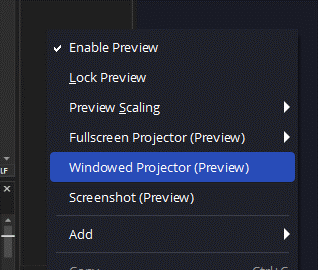
Now that we have created this great image, it’s time to use it! We can now record using OBS or start the virtual camera, allowing you to share this OBS view as a camera source on any application that takes in a camera, such as Teams or Zoom. Also, if you right-click in the grey area around the preview in OBS, you can select “Windowed Projector,” and if the preview doesn’t fill the whole Projector window, you can right-click and select “Fit window to content.”
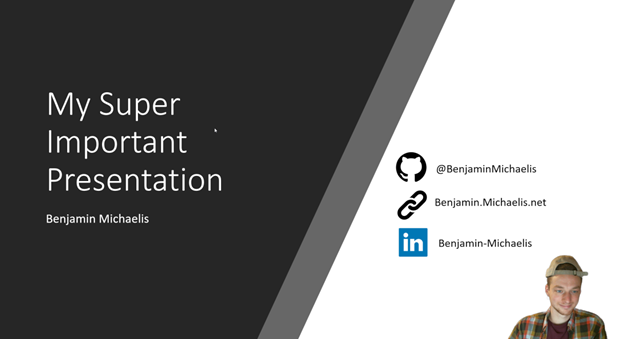
When you want to share your screen, select this preview window as your input. You get your new and improved setup in important meetings, presentations, and much more!
Wrapping Up
You are now fully equipped to give very important presentations in your Teams meetings with this new and improved setup, creating engaging presentations guaranteed to capture the full attention of your audience.
More Ideas?
Do you have any new ideas for utilizing this setup or any new setups you would like to use? Let me know in the comments below!

Does Your Organization Need a Custom Solution?
Let’s chat about how we can help you achieve excellence on your next project!